I have been, and always will be, a sucker for anything that’s pickled or fermented. Maybe it’s a southern thing. My mom (from Alabama) and my dad’s mom (from Virginia) almost always had something pickled on the table. We went through jars and jars of pickles, relish, sauerkraut, chow chow, pickled beets and beans and more.
As we got older and got exposed to fermented items from around the world, we got to love pickled ginger and daikon and my mom was an early devotee of kimchi.
In our own garden we would grow rows and rows of cabbage and make our own sauerkraut. Mom would cut up the cabbage and layer in a crock pot with salt. She would place a plate on top of the cabbage, weight with a heavy rock and place in a cool, dark place for a few weeks. She’d check it every few days and skim off any naturally occurring spores that would be on top.
I still have the crock pot.

We’d eat some of it fresh but, seriously, how much sauerkraut can you eat at one time especially when there are gallons of it???? So mom would then process it for us to enjoy later.
I, on the other hand, am not feeding a large family like she was AND I want to enjoy the benefits of lacto fermentation.
What is Lacto Fermentation?
Simply put lacto fermentation is a process that allows good bacteria like lactobacillus, to grow in an anaerobic environment for fermentation. This natural process has been in use for generations as a way to preserve, and enjoy, food. Think about it, before modern canning and refrigeration, how would you preserve food without getting sick???
In addition to pickles, kimchi and sauerkraut, yogurt and some cheeses are lacto fermented.
Not only are these foods tasty their probiotic qualities promote good gut health. Probiotics aid in digestion and help improve our immune systems. As I get older, I appreciate even more the importance of having a healthy digestive system.
Since this process is one that occurs naturally, just using the yeast in the environment, you don’t need much to get started.
Getting Started
I’ve been wanting to make a successful batch of kraut for a long time. I tried unsuccessfully to make a batch of kimchi. One afternoon at my favorite kitchen shop Spoon and Whisk, I saw a Perfect Pickler kit.
Basically it’s a lid that fits on top of a mason jar that allows you to create an anaerobic environment. The kit also comes with a CD with an instructional video and recipe booklet with tips and techniques for making your own pickles and sauerkraut. The website also has an instructional video that was really helpful too.
That gave me a good overall idea of what to do but these blog posts and videos were REALLY helpful and gave me the confidence to go for it.
Cultures For Health has a simple, straightforward guide to walk you through selecting the right ingredients, the supplies and methods you can use. The guide also has a recipe.
I wasn’t sure what salt to use. I had Pink Himalayan salt, pickling salt, table salt, kosher salt and Celtic salt in the house. Make Sauerkraut! had a detailed guide to choosing the right salt for your kraut.
Finally, this video “Lactofermented Sauerkraut” from CookTraditionalFoods showed me how to go through the whole process from start to finish. Extra bonus? Her voice reminds me of the SNL ‘shwetty balls’ NPR ladies’ voices. So I was educated and entertained at the same time!
Going For It!
I was now ready to go for it. I had extra cabbage from St. Patrick’s Day (who the heck buys four heads of cabbage for three people????), pink Himalayan sea salt and the tools for an anaerobic environment.
I learned that the secret to a successful batch is the right amount of brine salinity (2%), to use 1 tablespoon of salt per 1 3/4 pounds of cabbage, to thinly slice the cabbage and to let it ferment for 2-3 weeks in a cool-ish environment.
March 31 I gathered my ingredients and supplies:
- Scale to weigh cabbage
- Large bowl
- Cutting board and knife (I tried using a veggie slicer but it just didn’t work)
- Pink Himalayan salt
- Mason Jar
- Perfect Pickler

NOTE: Reserve some of the large outer leaves. You’ll need them to create a cap, or lid, to place on top of the sliced cabbage.
I quartered each head of cabbage, removed the tough center core and began thinly slicing . . . and slicing . . . and slicing.
Place the slices in a large bowl as you go so you know how much salt to add to your cabbage – 1 tablespoon per 1 3/4 pounds of sliced cabbage.
Slicing isn’t the hard part. It’s massaging the salt into the cabbage so that the cabbage breaks down and you get a lot of juicy brine. I cheated after a bit and weighted my bowl of cabbage down with some weight. (In my case, a big jug of vinegar.)

Nearly two heads of thinly sliced cabbage.
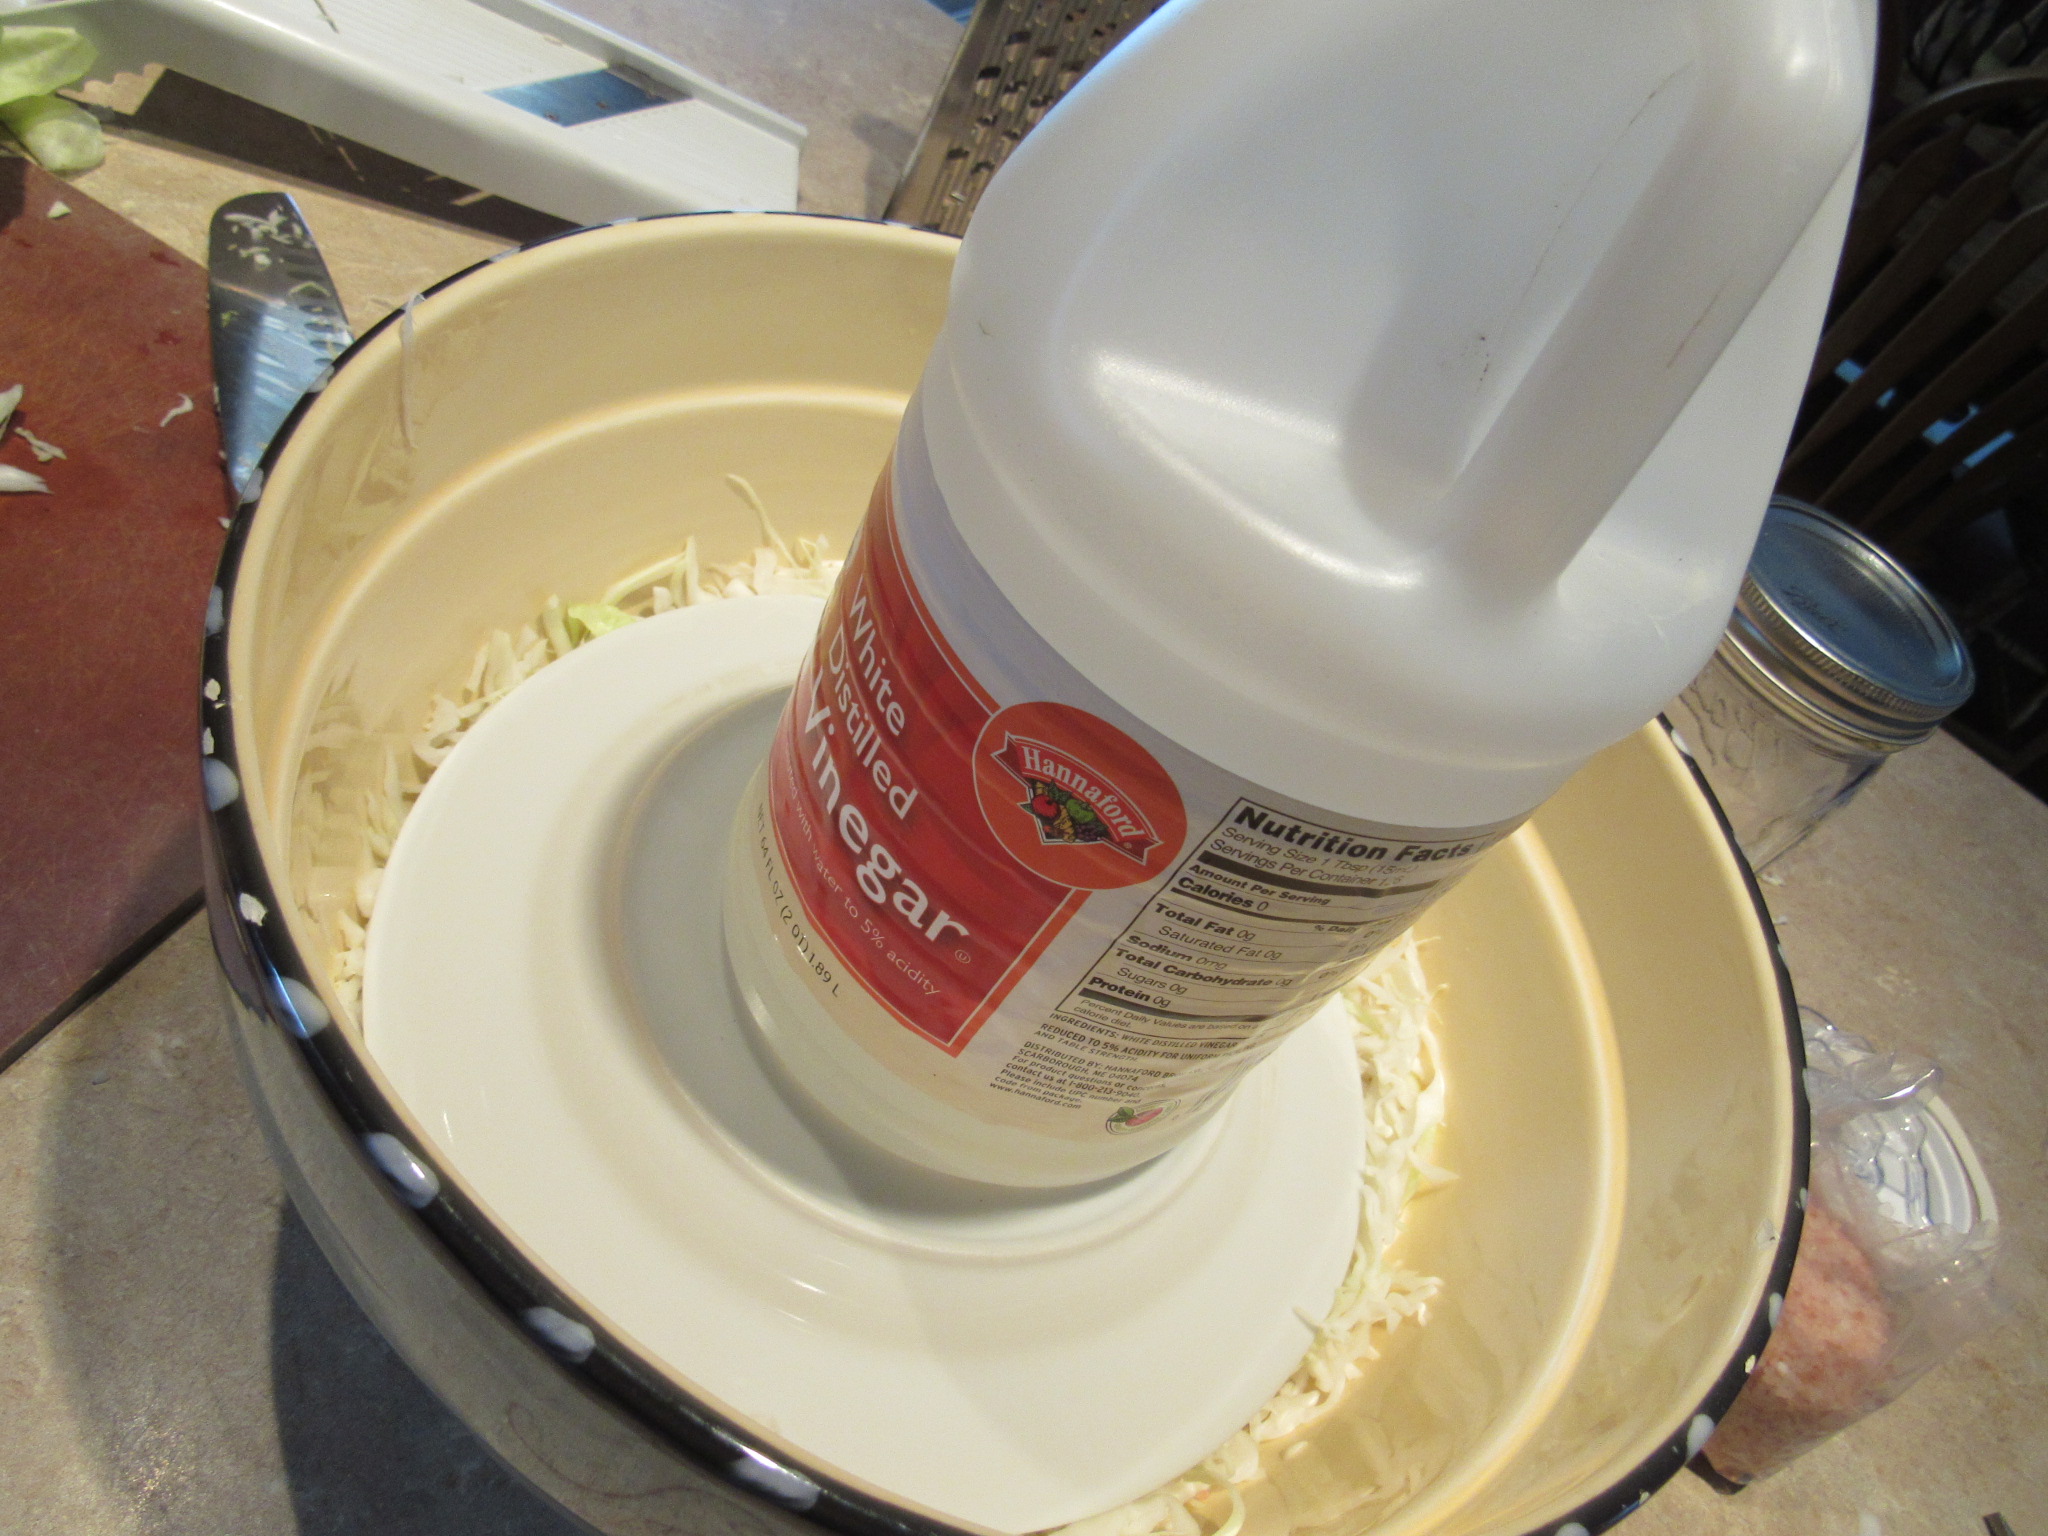
You need to massage the salt into the cabbage to get the amount of brine you’ll need. To speed up the process, I added a little weight to help squeeze out the moisture in the cabbage to speed up the brine making process.
After all the massaging and rubbing and squeezing (wait, are we still talking about making sauerkraut??), you’ll be able to fit ALL OF IT into a quart jar. For real.

For you experienced sauerkraut makers, you have probably spotted my first mistake. I’ll get back to that in a minute. But basically at this point, you’ve got your chopped cabbage, in the jar with all air bubbles pushed out. On top of that are the cabbage leaves and then the brine.
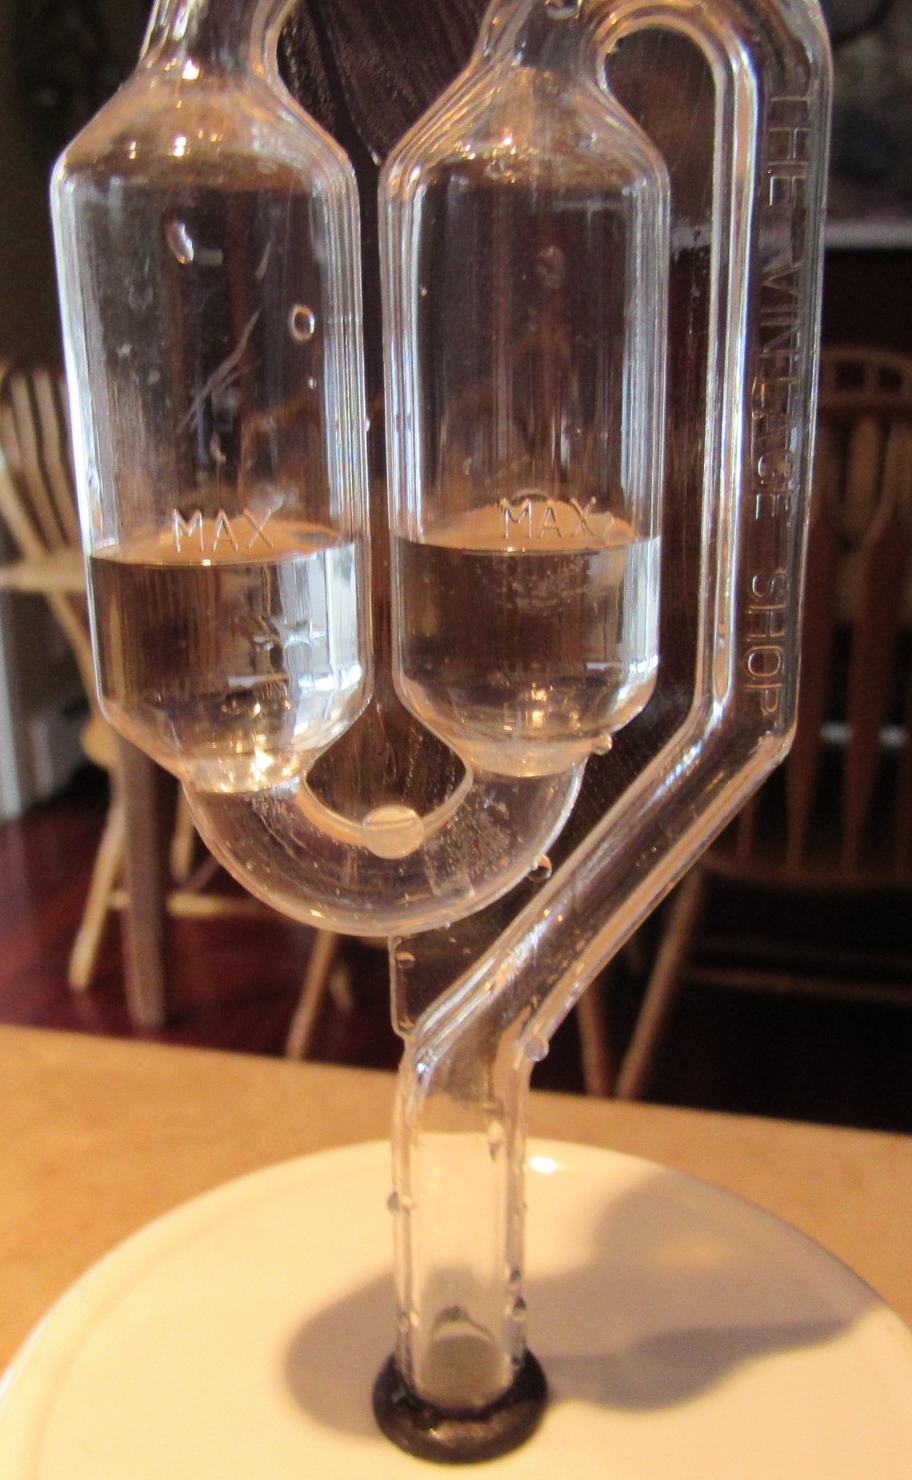
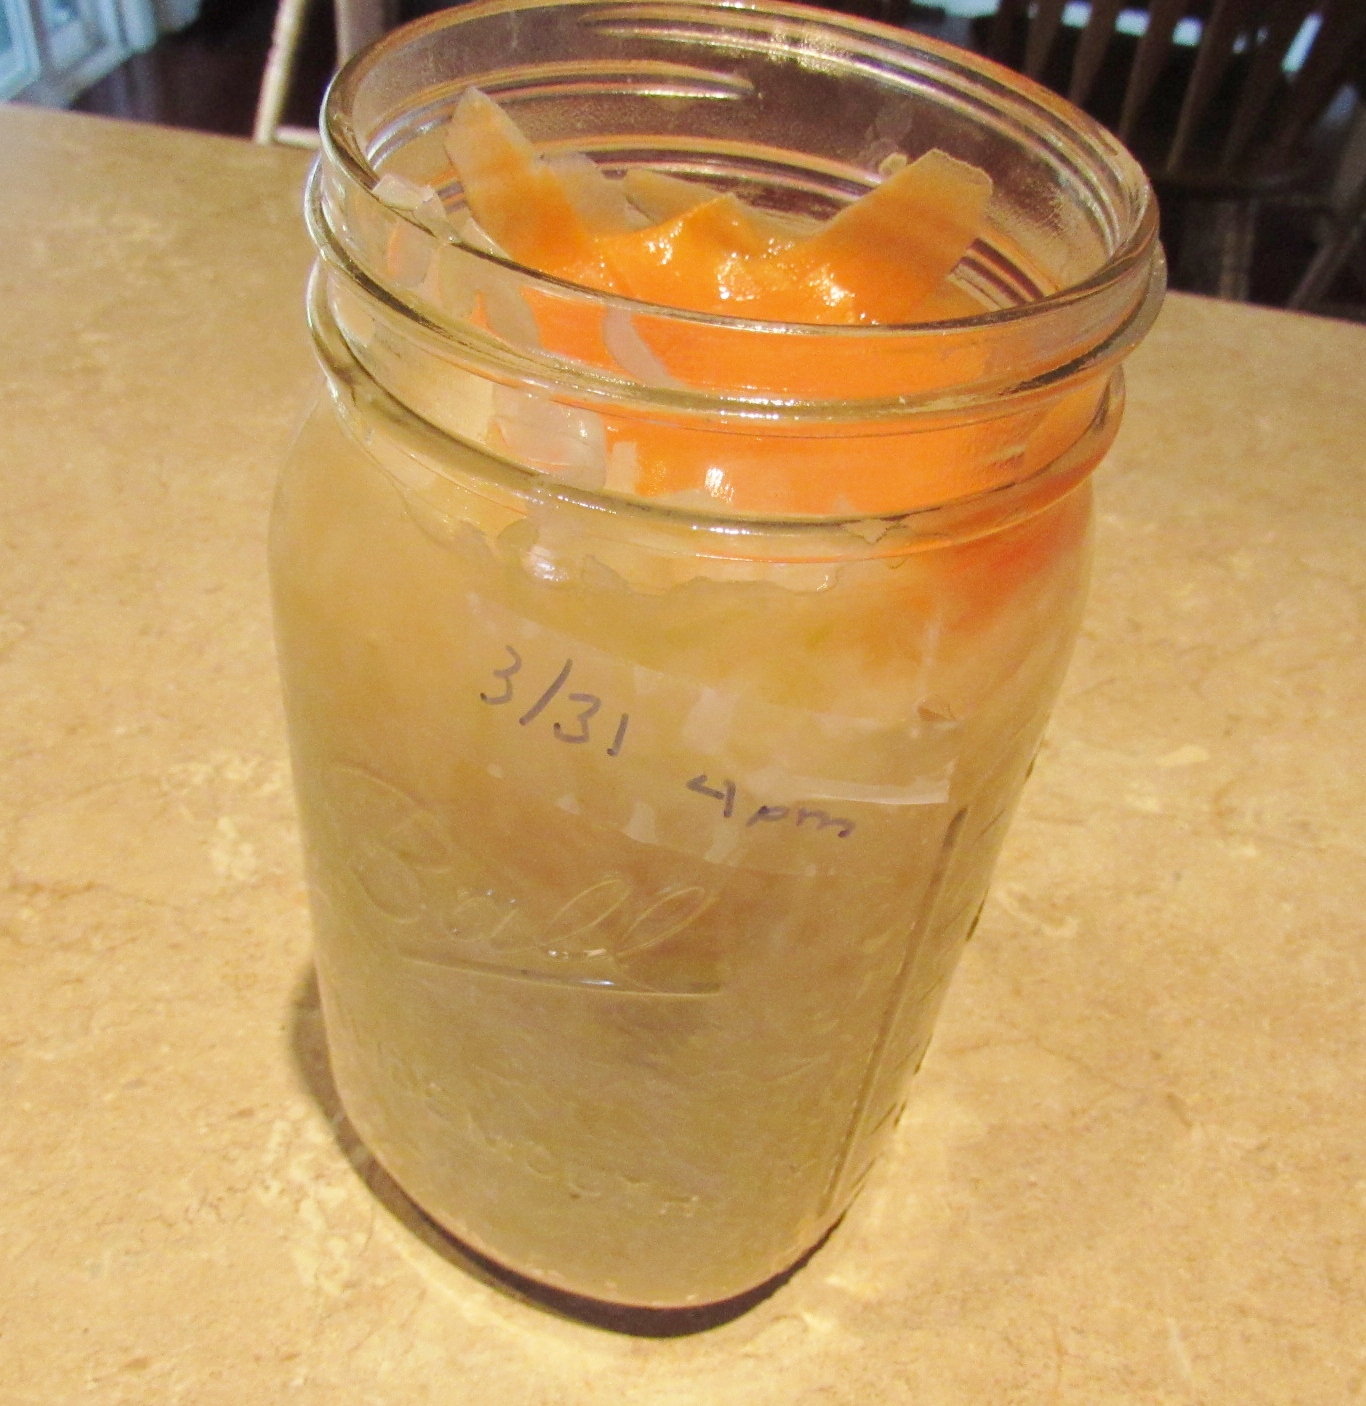
To create the anaerobic environment, place the Perfect Pickler lid on the jar and then add the air lock. I put a piece of tape on the jar with the date on it.
Okay, fast forward. The instructions that came with the Perfect Pickler kit said it would take about seven days. WRONG! I tasted after a week and blech! Not good. So I made two adjustments.
1) I added more brine at 2% salinity and filled the jar more. To taste I removed the cabbage top so I had to replace with strips of grated carrot (a tip from the CookTraditionalFoods video) and 2) I added the floating brine cup to also ‘weight’ the cabbage too.
Success!
So so good!
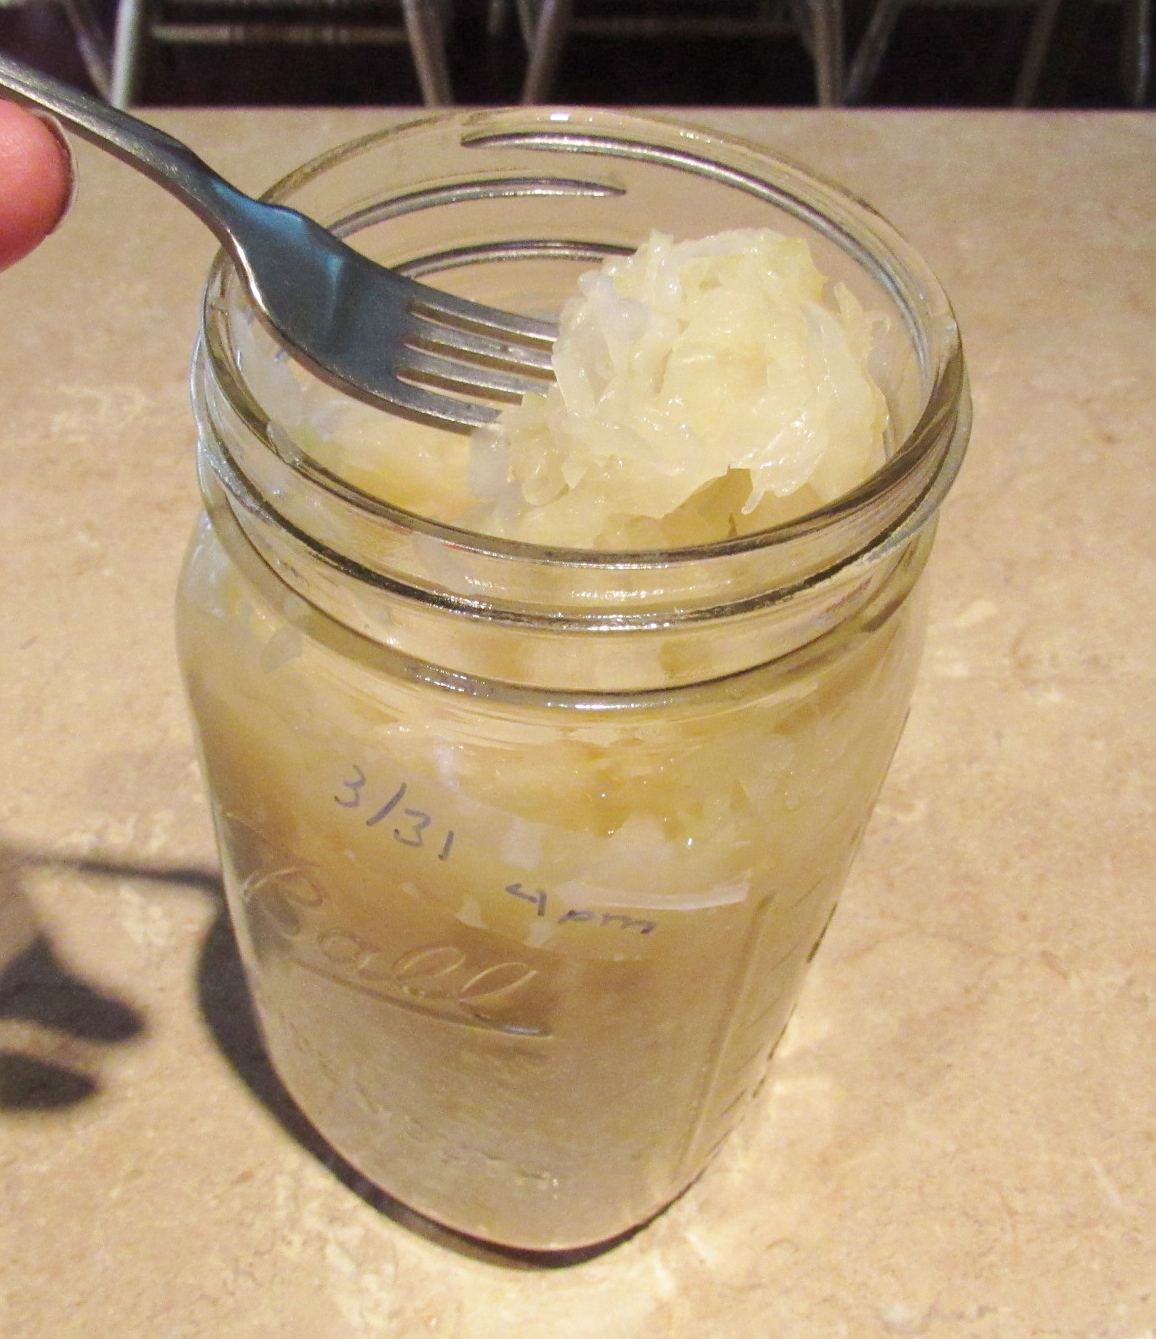
I am by nature impatient so the next week seemed to crawl by. Finally April 15 arrived and VOILA!!!! I tasted. And nodded. And smiled.
I handed the fork to Mark. He tasted. And nodded. And smiled.
SUCCESS!!!!
The two of us have been eating it out of the jar and, circling back to St. Patrick’s Day, been making grilled corned beef sandwiches with sauerkraut and Swiss cheese. Yup, not only did I buy too much cabbage. I went a little nuts on the corned beef too.
To store the sauerkraut, just put in the refrigerator with a mason jar lid on top. It will keep for months but I doubt yours will last that long. I hope this inspires you to give lacto fermenting a try. It sounds a lot scarier than it actually is.
You can do it!!!